IM-Home Universe Help Guide
Minimum System Requirements
Minimum Requirements:
Operating System – Windows 7, Service Pack 1
Processor – Intel Core 2 or better, AMD Athlon II or better
Processor Speed – 1.8 GHz or better
RAM – 2 GB or more
Internet Connection – 56 Kbps modem or faster
- Note: Internet connection is required.
Preferred Requirements:
Operating System – Windows 10
- Note: Windows RT is not compatible with IM-Home Universe
Processor – Intel Core “ix” Family (i3, i5, i7), AMD Phenom 2 or better
Processor Speed – 2.2 GHz or better
RAM – 4 GB or more
Internet connection – DSL or Broadband
- Note: Internet connection is required.
Minimum Requirements
Operating System – OSX 10.7
- Note: iOS devices are not compatible with IM-Home Universe
Processor – Intel Core 2 or better
Processor Speed – 1.8 GHz or better
RAM – 2 GB or more
Internet connection – 56 Kbps modem or faster
- Note: Internet connection is required.
Preferred Requirements:
Operating System – macOS Sierra
- Note: iOS devices are not compatible with IM-Home Universe
Processor – Intel Core “ix” Family (i3, i5, i7)
Processor Speed – 2.2 GHz or better
RAM – 4 GB or more
Internet connection – DSL or Broadband
- Note: Internet connection is required.
Getting Started
Watch this video for a quick IM-Home software download tutorial.
The first step in getting started requires that you activate your IM-Home 3.0 Universe Member Account. This step is most important because it ties your IM-Home unit to your initial free User License. Please follow the steps below.
- NOTE: If you have purchased licenses for other family members, please see attached topic titled “Additional User Licenses”
1. Install the IM-Home 3.0 Universe software on your PC or Mac.
2. Connect the IM-Home box to your computer with the USB cable provided.
3. Enter your UserID and Password. If you purchased the IM-Home unit from the IMHome.org website, you should have created your own Trainee UserID and Password. If you have purchased this unit directly from your Provider and do not know this information, you should contact your Provider to retrieve it.
- NOTE: You should have received an auto generated email with this information. If you did not, please contact your IM Provider.

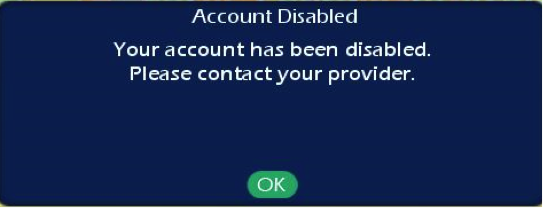
- NOTE: Your Provider should have already accepted you as an eClinic member. If you receive the following error after entering your Login information, please contact your IM Provider.
4. Once you have logged in, the system will prompt you to order your membership. Press the “OK” option.

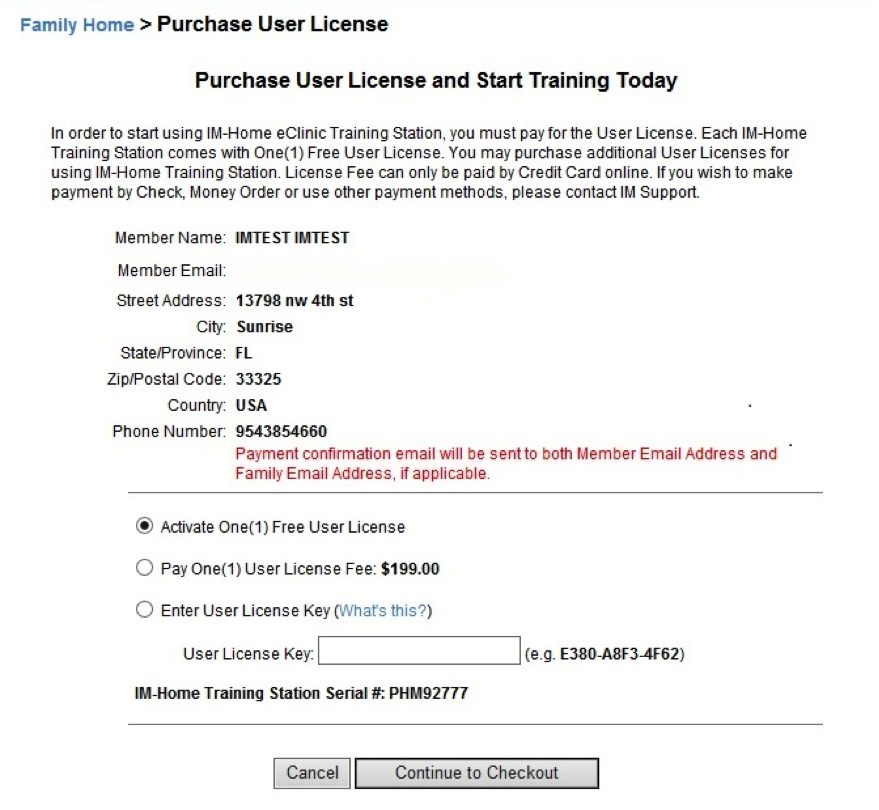
5. You will be automatically re-directed to the IM-Home eClinic “Purchase User License” page. The default option “Activate One (1) Free User License” will be selected. Click the “Continue to Checkout” option.
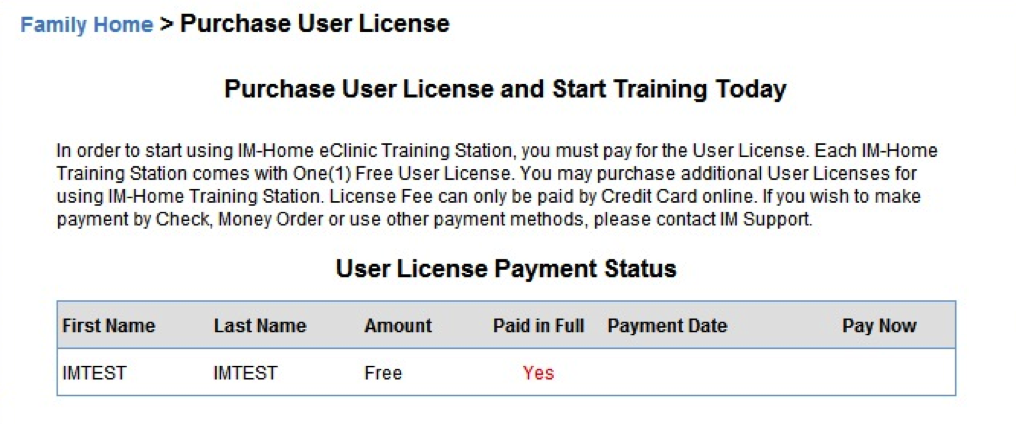
6. Once the User License has been activated you will see the following screen indicating that the account is paid in full.
7. Your account has now been successfully activated. You may now return to the IM-Home Universe software and login.
*The following steps are shown on a PC running Windows 10 using the Microsoft Edge web browser.
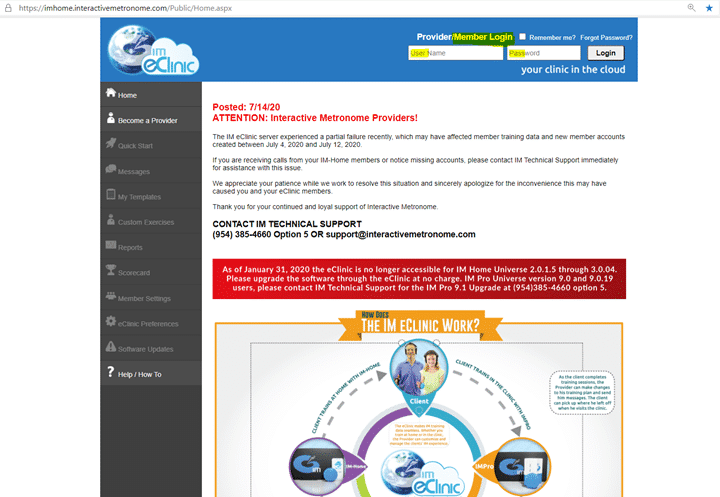
1. Login to the Interactive Metronome e-Clinic website using the Username and Password that was either supplied by your IM provider or created during your IM Home equipment purchase.
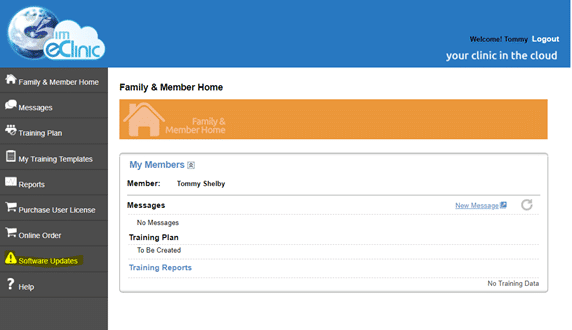
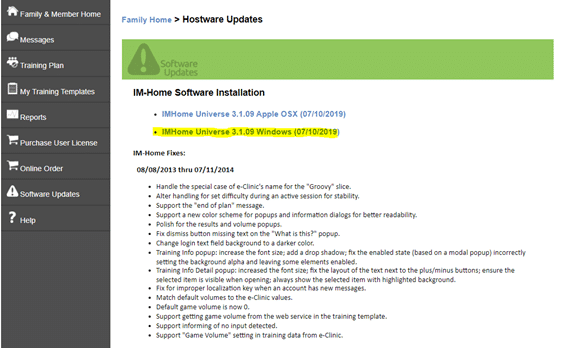
4. Your download will usually appear in the lower right corner of the screen (taskbar)

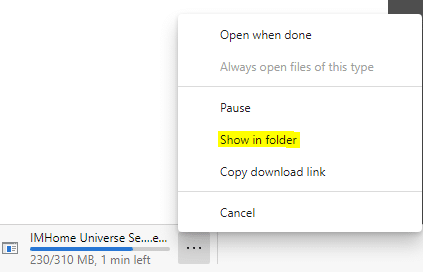


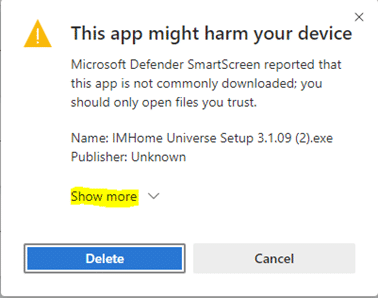
6. Click “˜Keep anyway’
7. You should now be able to click the IMHome Universe Setup 3.1.09.exe file

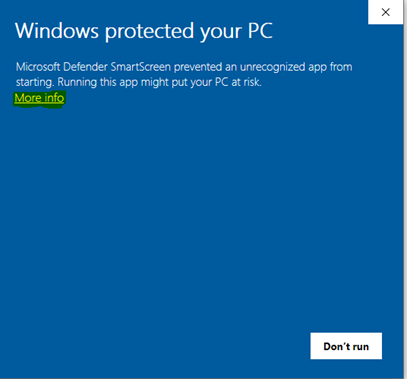
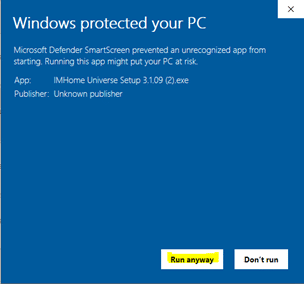
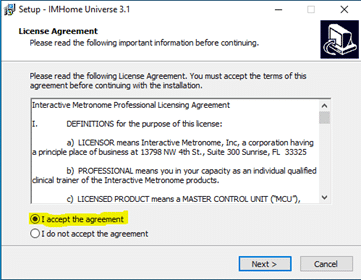
10. Accept the License Agreement to begin your installation.
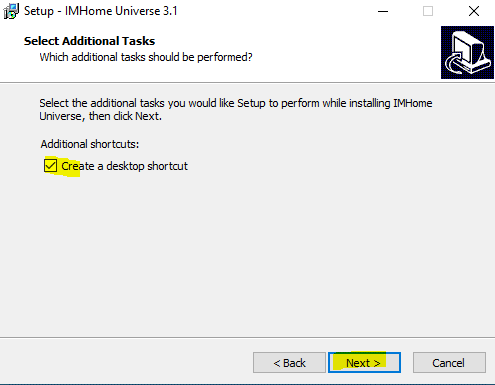
11. Click next to proceed with the installation.
12. Click Install to proceed.
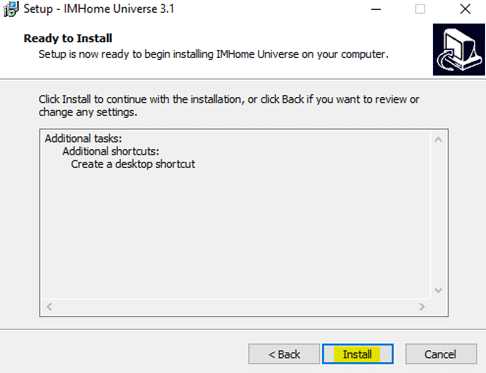
13. The install will begin extracting and copying files.
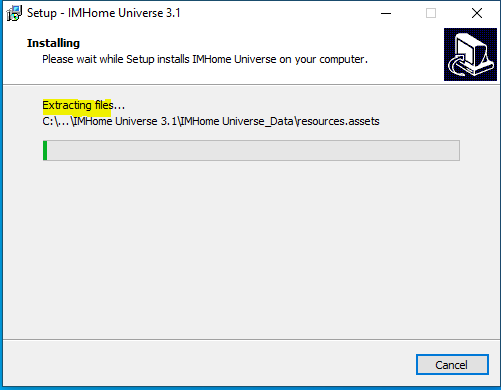
14. Once files have been installed you will be prompted to finish and exit setup. The option to Launch IMHome Universe will be selected by default. Click FINISH
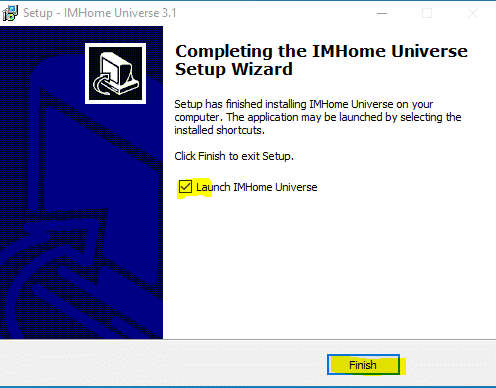
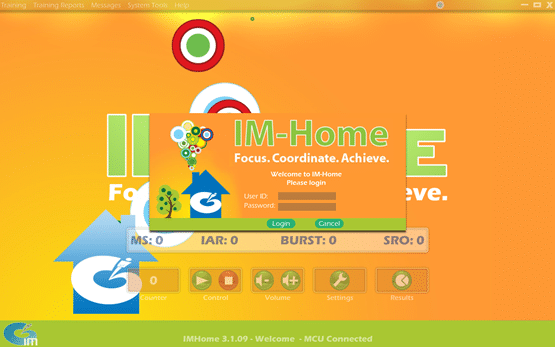
CONGRATULATIONS! Your IMHome Software has been successfully installed! The application will open to the IMHome interface. Follow the Quick Start Guide that came with your equipment to login and authenticate your IMHome User License.
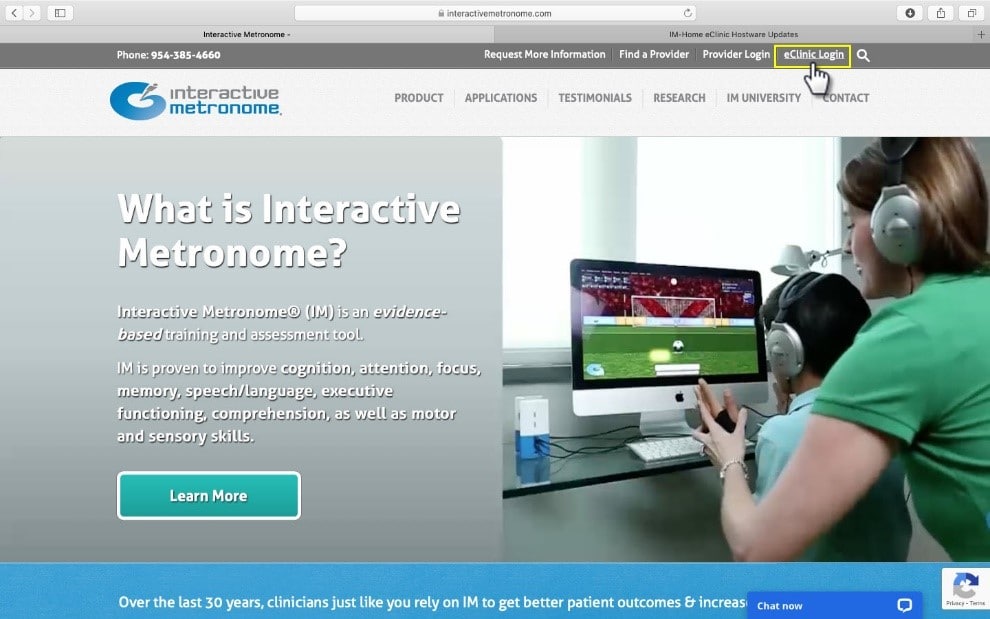
1. Login to the IM E-clinic website
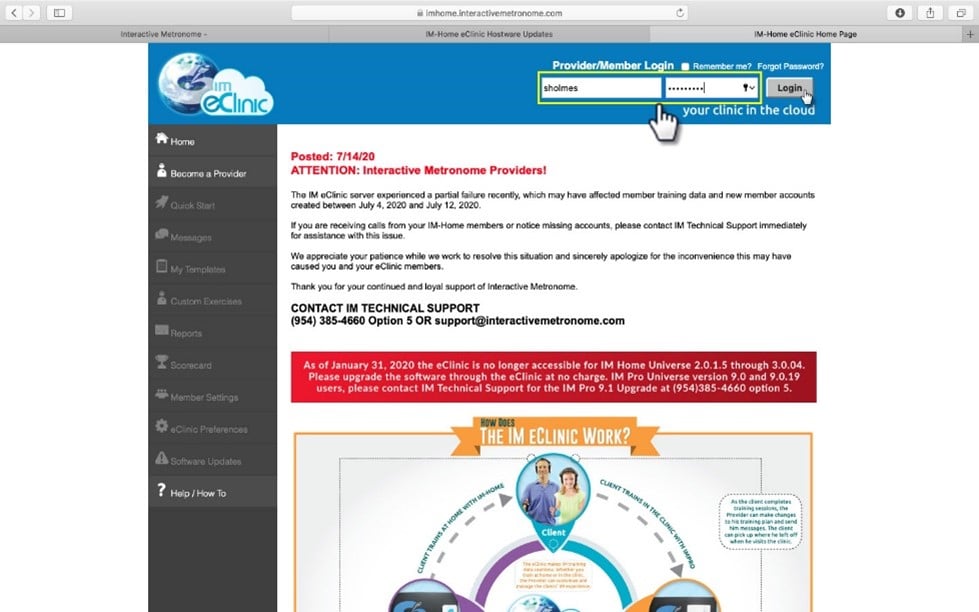
2. Enter the ID/PW issued by your IM provider or the one created during your online purchase
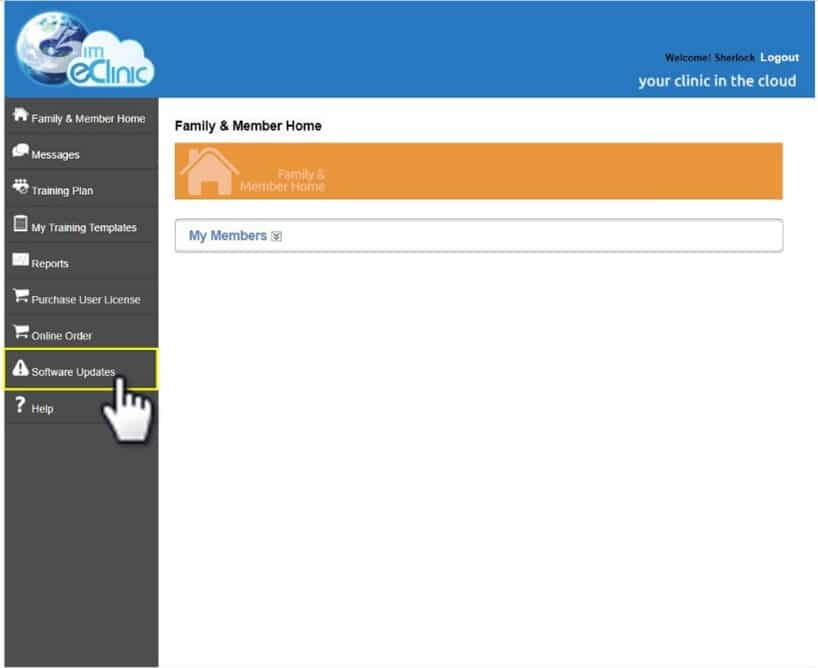
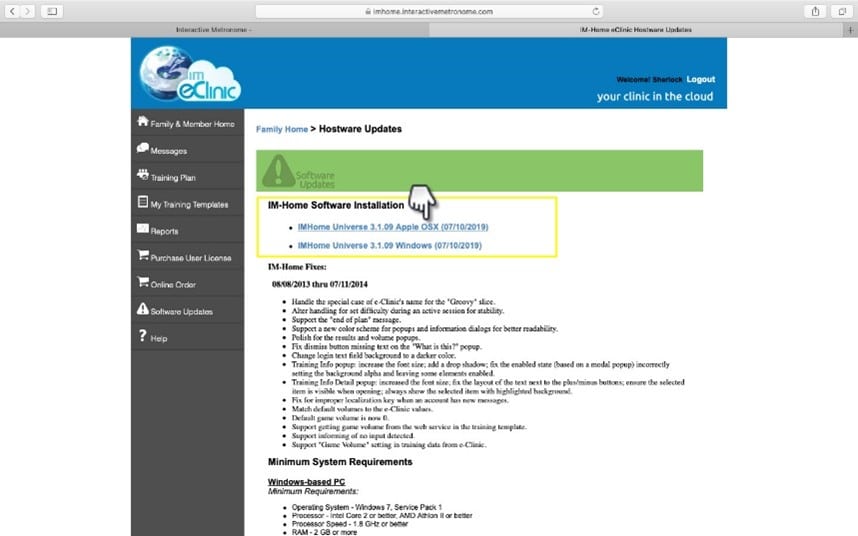
4. You will have two options: Windows or Apple (OSX)- Be sure to select the correct download for your OS
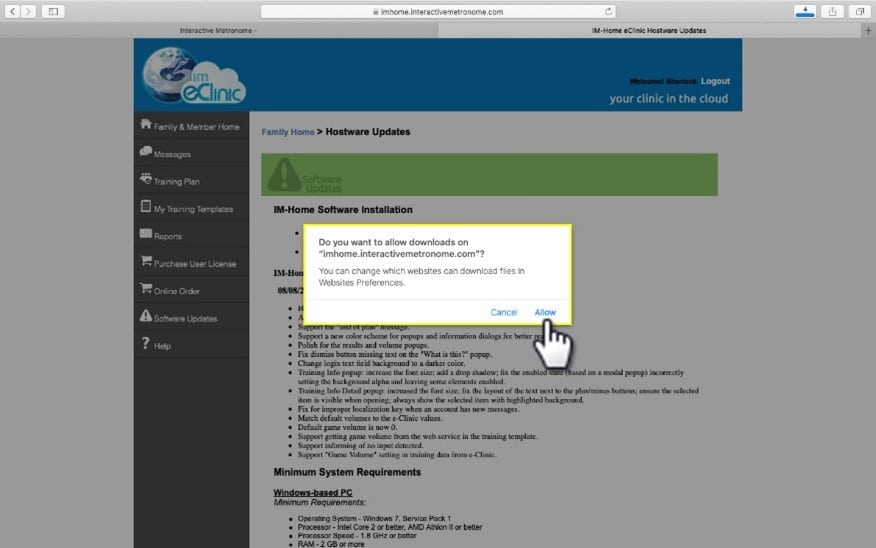
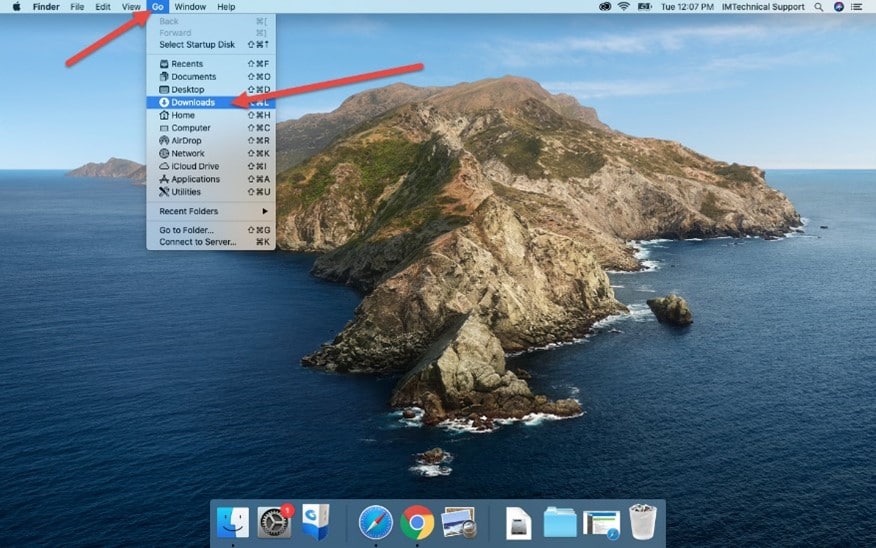
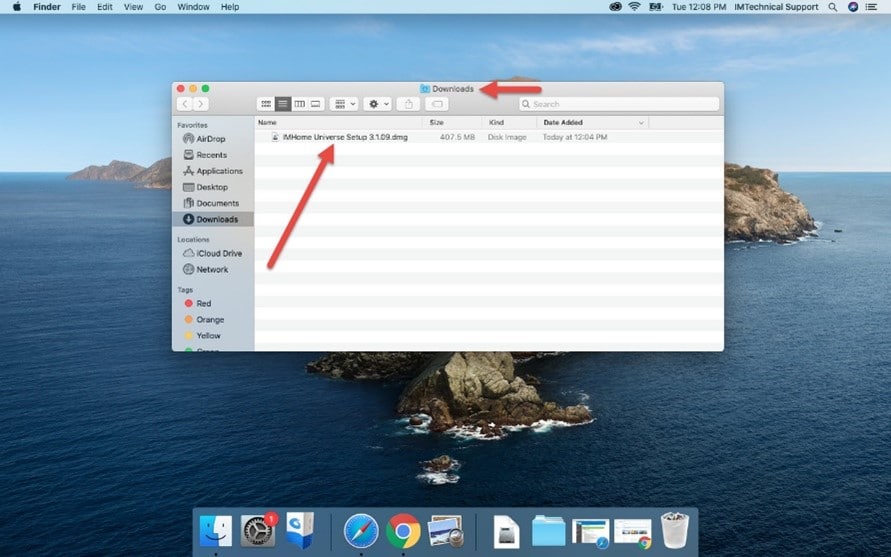
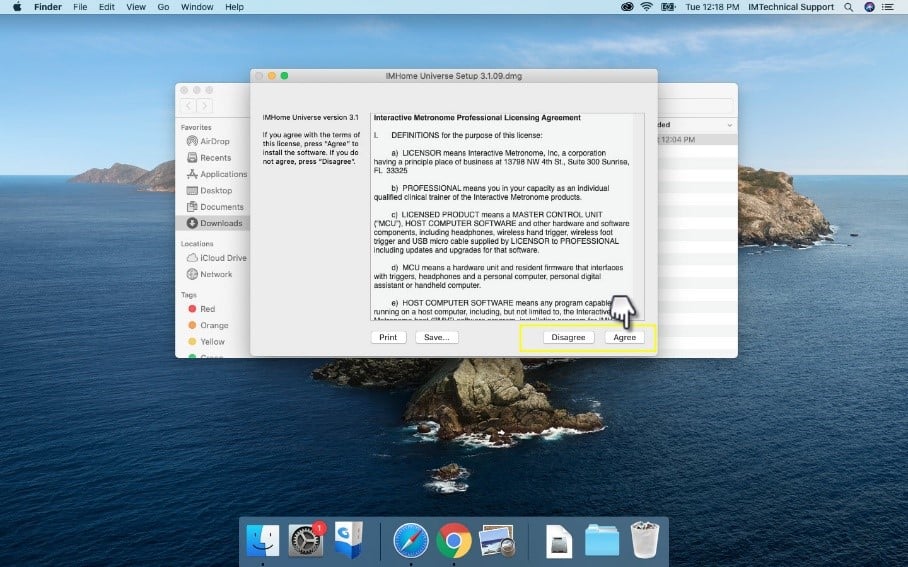
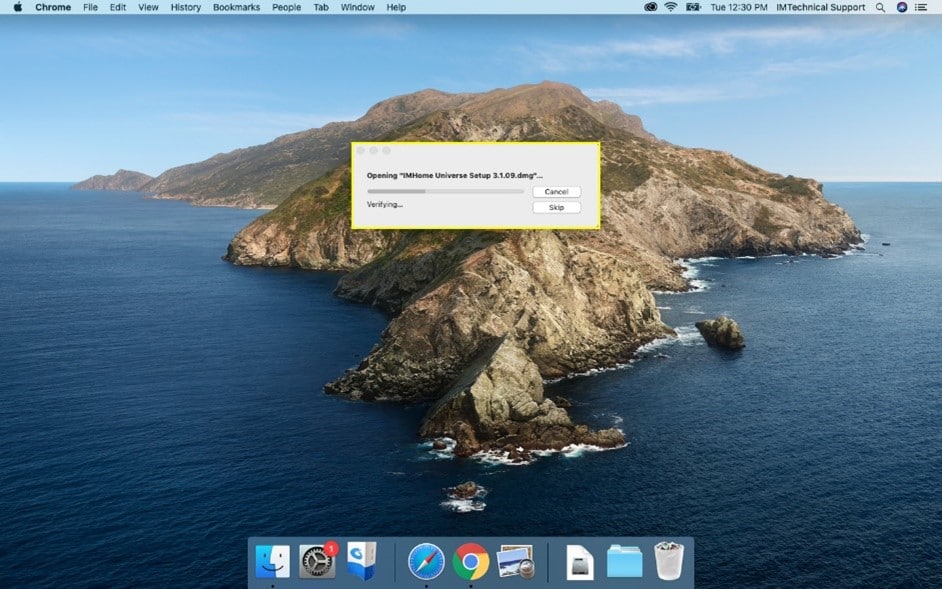
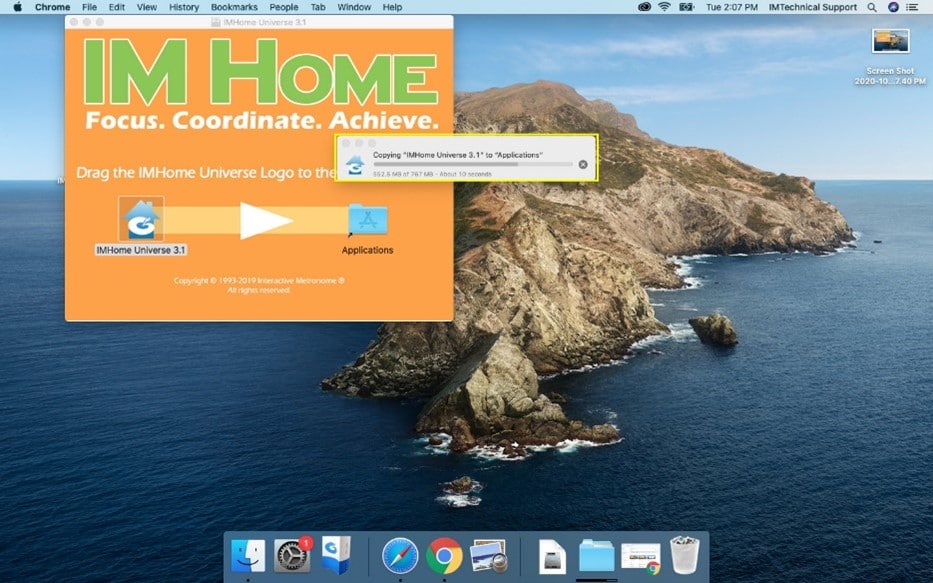
9. The Mac OS will verify the file and then ask you to Drag & Drop the software icon to your Applications folder
The file will now be copied to your applications folder
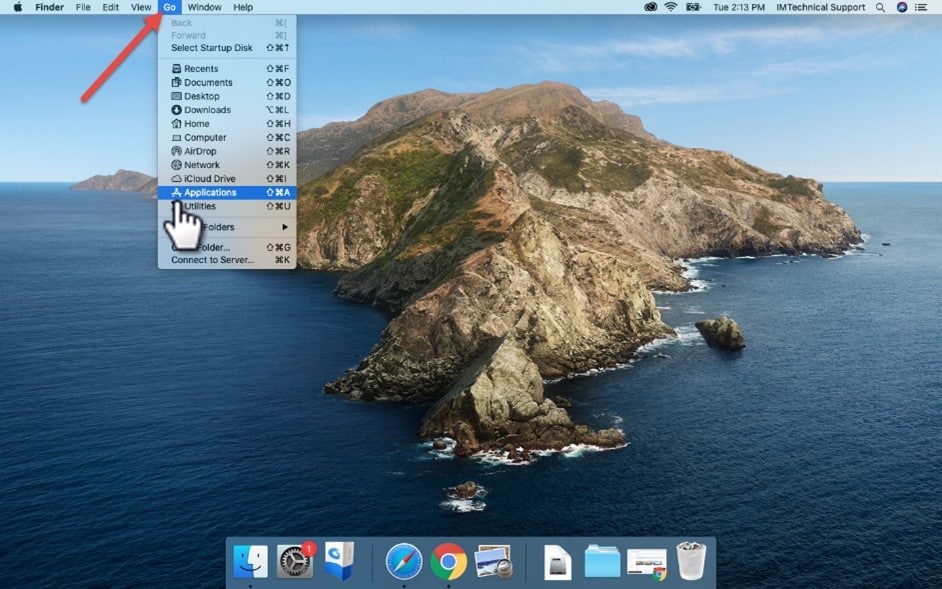
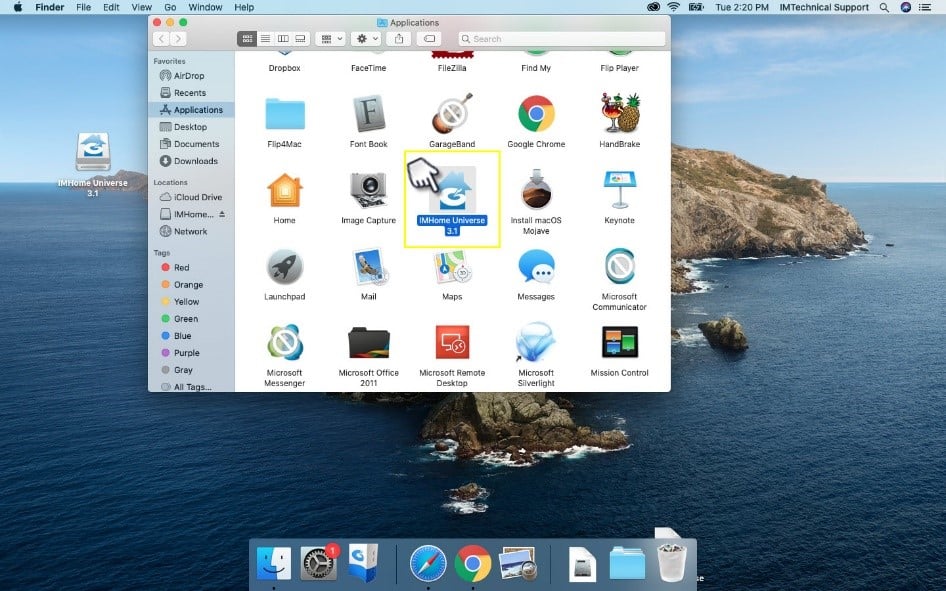
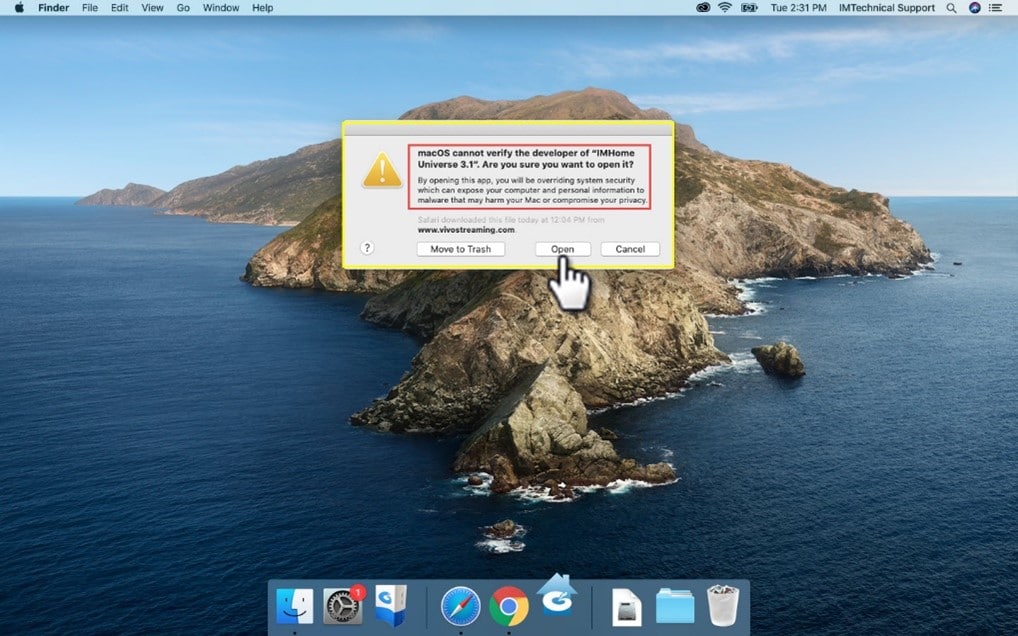
11. Once you have located the IMHome icon, HOLD DOWN THE CONTROL KEY on your keyboard and then Click the IMHome icon as you are holding the control key. You will see a message appear:
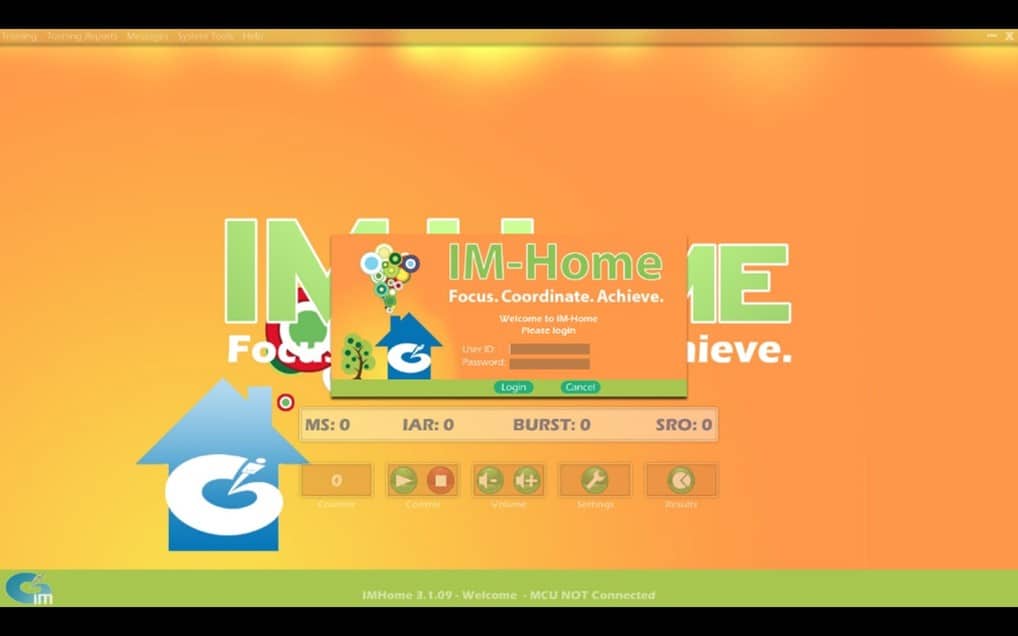
12. CONGRATULATIONS YOU SHOULD NOW SEE THE IM HOME SOFTWARE LOGIN PAGE:
Next steps:
- Authenticate your IM Home user license
- Begin your IM Home Training
Wireless Unit
- NOTE: In order to purchase an IM-Home wireless unit you MUST first have selected a Certified IM-Home Provider.
If you have not selected a Provider, please locate one by visiting the following link: https://www.interactivemetronome.com/IMW/IMLocator/LocatorIndex.aspx
1. To purchase a wireless unit visit the page: https://www.interactivemetronome.com/order-im-home
2. Click the Order the Equipment Only button under: “Already have an IM-Home Specialist?”
3. You will now be directed to the Equipment Only Order screen:
 At this stage you will add the IM-Home Universe wireless unit by clicking the “Add to Cart” box, as seen in the picture above.
- If you require additional User Licenses, enter the quantity and then add those to your cart by clicking the “Add to Cart” box.
- If you do not require any additional User Licenses at this time, skip step “b”. You may purchase additional User Licenses as needed in the future.
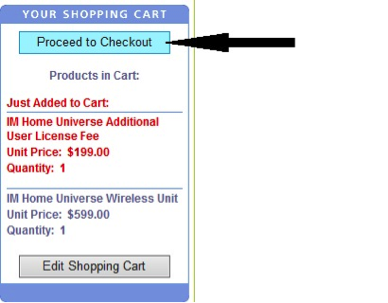
5. Once you have made your Equipment/License selections and added them to your cart you will see the Shopping Cart to your right updated with the items you have chosen. Click the “Proceed to Checkout” option.
6. You will now be directed to the Member Information screen:
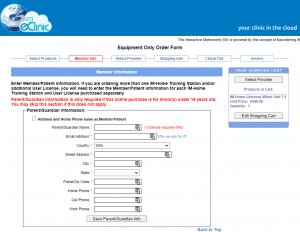
a. You MUST enter information in the fields marked with the red asterisk (*) as they are required entries and you cannot proceed without this information.
-
- You will create your own Trainee User ID and Trainee Password. The system will notify you if the username that you have chosen is already in use. Passwords ARE case sensitive.
- Click the “Save Member Info” box after completing this section.
b. If you have only purchased the IM-Home Universe wireless unit with NO additional User Licenses, your section heading will read “Member/Patient Information 1 of 1”.
c. If you have purchased additional User Licenses, you will be asked to enter the Member/Patient Information for each additional user at this time. (as seen below)
-
- Section Heading: Member/Patient Information 2 of 2
- Click the “Save Member Info” box after completing this section
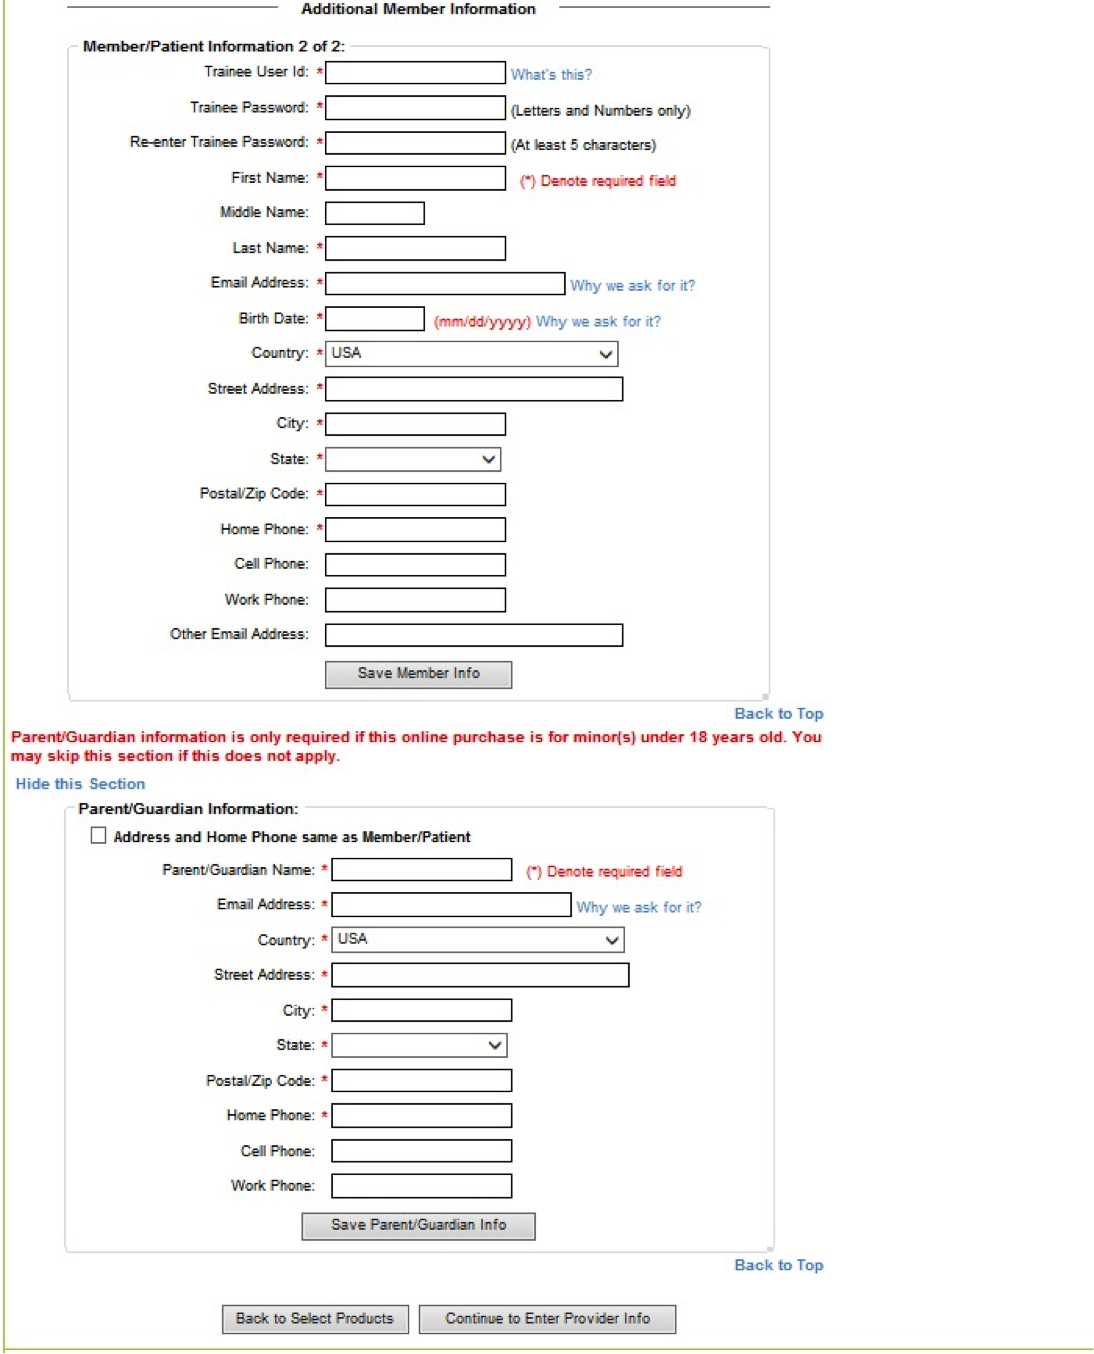
d. The last section from the screenshot above is reserved for the Parent/Guardian Information.
- Parent/Guardian information is only required if this online purchase is for minor(s) under 18 years old. You may skip this section if this does not apply.
-
- Click the box to auto-fill the Address and Home Phone fields if it is the same as previously entered above.
- Click the “Save Parent/Guardian Info” box after completing this section.
- Click the box to auto-fill the Address and Home Phone fields if it is the same as previously entered above.
7. Once all of the required information has been entered in this section you may click the “Continue to Enter Provider Info” box.
![]()
8. The next screen will ask you to locate your Provider.
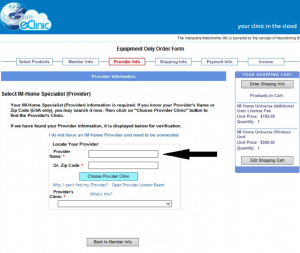
a. Simply begin typing the last name of your provider in the Provider Name field and names will appear in a drop list that closely match your query.
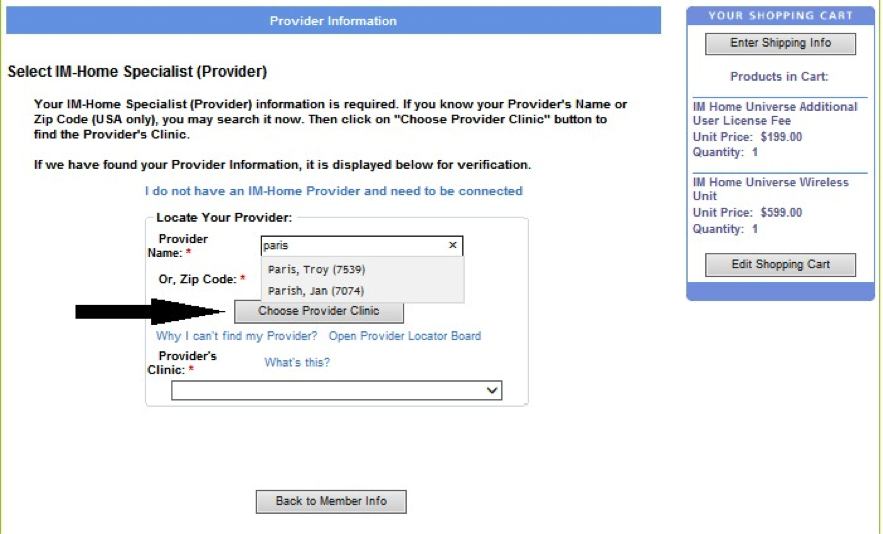
b. Once you have selected the correct name from the list, click the “Choose Provider Clinic” box which will auto-populate the Provider’s Clinic field at the bottom.
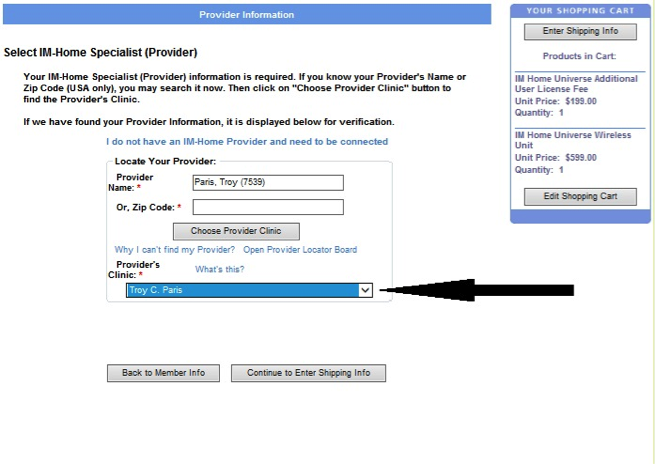
c. You may proceed by clicking the “Continue to Enter Shipping Info” box.

8. You will now be directed to the Shipping Information screen:
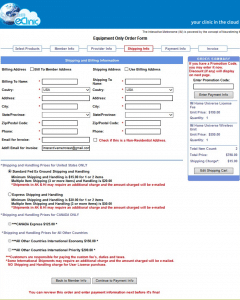
- All the fields marked with a red asterisk (*) are required. Please indicate if your shipping address is commercial by selecting the check box for “NON-Residential Address”.
- Clicking the “Bill to Member Address” box will auto-populate the fields below with previously entered information (provided the information is correct for these purposes). Clicking “Use Bililng Address” will also populate the shipping fields below (once again, provided the information is correct for these purposes).
- Select your method of shipping: Ground, Express or International. Make changes to your Billing and Shipping information as needed and click the “Continue to Payment Info” box.

10. You will now be directed to the Payment Information screen:
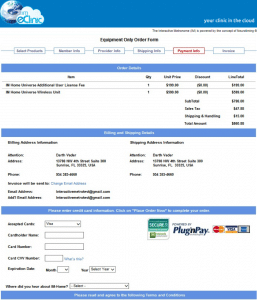
a. Check that your Order, Billing, Shipping, and email information are accurate.
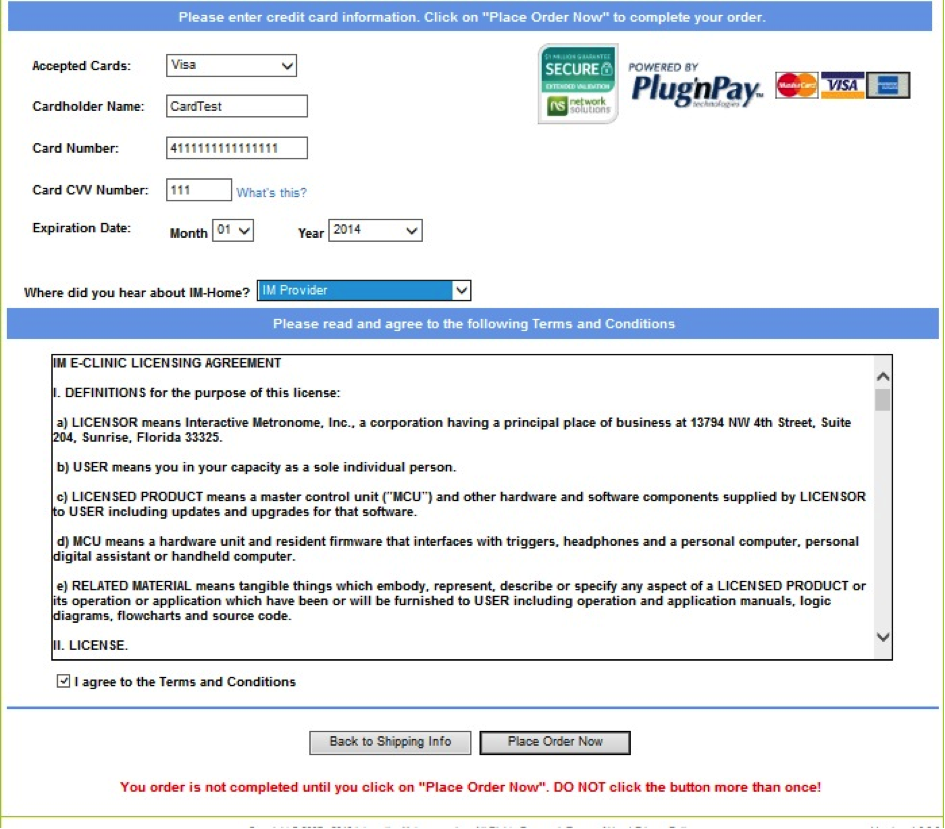
b. After confirming that your order is correct, enter your credit card information in the section provided.
c. Read the “Terms and Conditions” section and click to agree to continue.
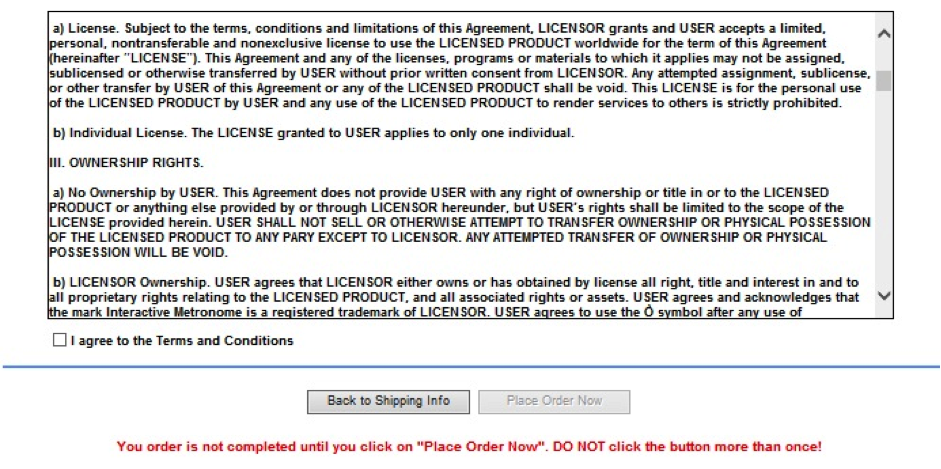
d. Once the “Terms and Conditions” have been accepted the “Place Order Now” box becomes a clickable option.
e. Click the “Place Order Now” button to submit your order.
11. Once the order has been submitted you will be notified immediately if the transaction was successfully processed and you will see the following message appear:
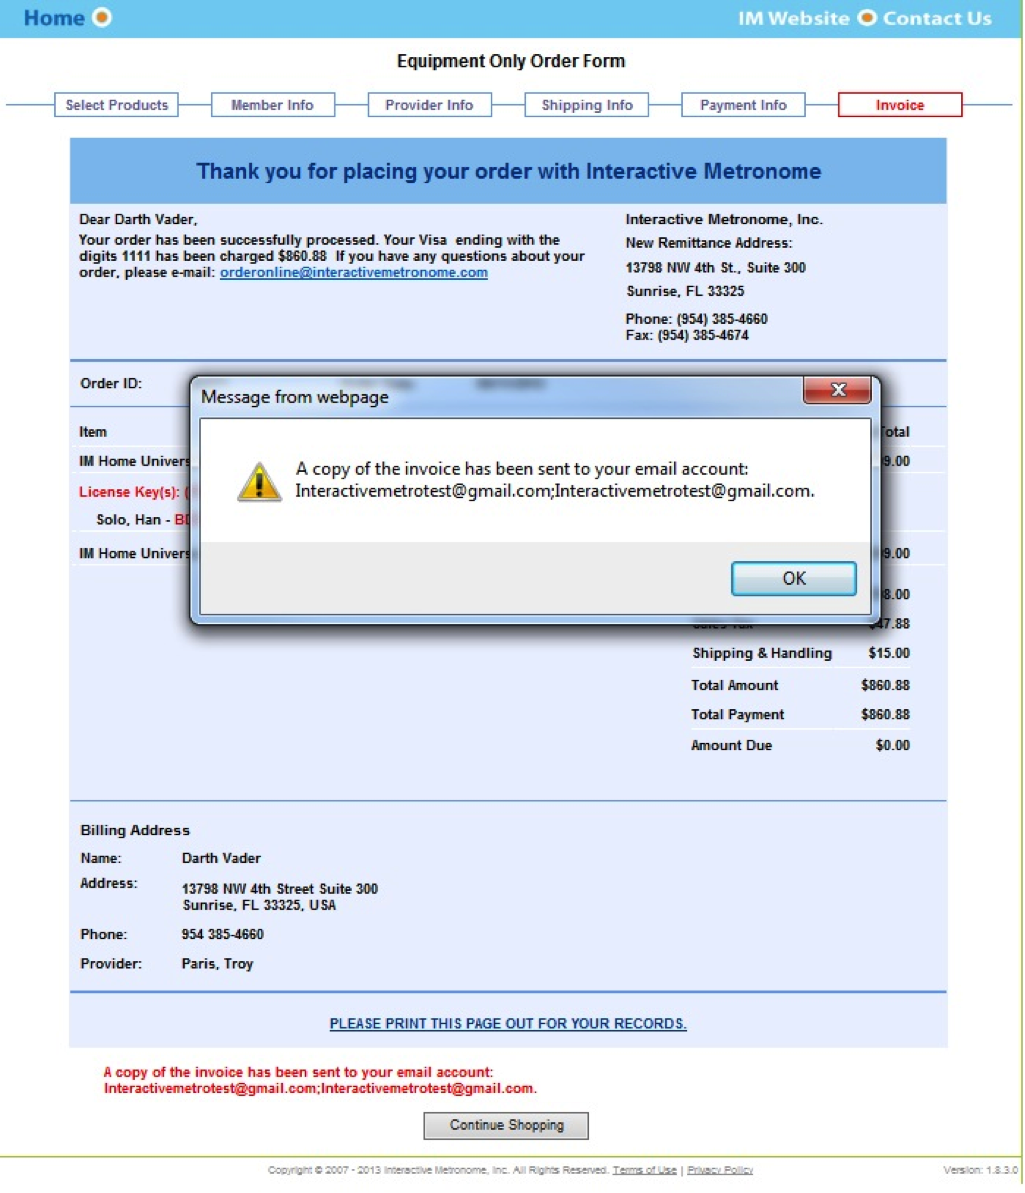
12. Click “OK” and your invoice will appear on the screen.
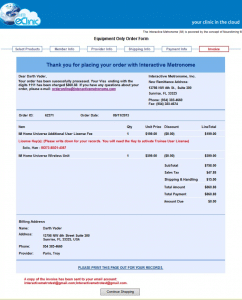
- NOTE: If you did not purchase any additional User Licenses, the License Key information WILL NOT APPEAR on your invoice.
CONGRATULATIONS! You have successfully purchased an IM-Home Universe wireless unit!

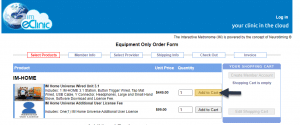 At this stage you will add the IM-Home Universe wireless unit by clicking the “Add to Cart” box, as seen in the picture above.